AACT Member-Only Content
You have to be an AACT member to access this content, but good news: anyone can join!
Chemistry Solutions
Although it has been a few years now, I remember fondly one particular undergraduate chemistry course: Qualitative Analysis. While I was taking the course, I felt like I was finally becoming a scientist.
In the course, we learned many things. For example, we learned about the specific properties of each element, such as its boiling point, freezing point (those were easy), and — by conducting the flame test — the characteristic flame color of metal elements. In the flame test, we heated a small amount of metal salt in a Bunsen burner flame until it began to burn. The color of the flame gave a hint about the identity of the metal substance. We were also given unknown samples to analyze using various tests, and we compared the test results to those of our flame tests of known metals in order to determine what each substance was. I was actually doing the detective work that got me interested in science in the first place!
 It is therefore not surprising to me that the “flame test” has long been a popular demonstration for teachers to show students. Who does not like to be amazed by the different colors that can be produced by seemingly similar substances? How better to help children open up to the wonders and possibilities that science has to offer?
Fast forward now to 2016, and I have “evolved” from that inquisitive student into a Laboratory Safety Manager for Northern Illinois University. I still enjoy the discovery and wonder of the adventure — as long as everyone stays safe.
That brings me today to discuss the ongoing concerns with the “rainbow experiment,” also known as the “rainbow flame” demonstration. These are fairly popular experiments and teacher-led demonstrations that center around burning specific metal salts in a flammable liquid to produce colored flames. Unfortunately, this experiment has resulted in several explosions and fires that have burned teachers and students, forever changing their lives.
At the heart of these and similar accidents is the flammable liquid methanol. Methanol is a highly flammable liquid that readily ignites at room temperature. It is not unlike gasoline in that respect. Furthermore, as with any alcohol flame, methanol can be nearly invisible as it burns. In response to the continuing accidents, several organizations have weighed in on these classroom experiments and demonstrations. Among them are the U. S. Chemical Safety Board (CSB), the American Chemical Society (ACS), and the National Fire Protection Association (NFPA).
The CSB released its report, “Key Lessons for Preventing Incidents from Flammable Chemicals in Educational Demonstrations,” in October 2014. The report included these key recommendations:
- Due to flash fire hazards and the potential for serious injuries, do not use bulk containers of flammable chemicals in educational demonstrations when small quantities are sufficient
- Employers should implement strict safety controls when demonstrations necessitate handling hazardous chemicals — including written procedures, effective training, and the required use of appropriate personal protective equipment for all participants
- Conduct a comprehensive hazard review prior to performing any educational demonstration
- Provide a safety barrier between the demonstration and the audience
Safety starts early — with a hazard assessment
As with any laboratory activity, no matter if it is at a university, industrial facility, or high school, there is some basic preparation that needs to be completed before any work on the demo itself is begun. First and foremost, a hazard assessment of the activity needs to be written down. There are plenty of ways to accomplish this. In its most basic form, a hazard assessment must address three questions:
- What could possibly go wrong (not only what has happened, but what is possible)?
- How can you mitigate that danger? Think of all your options — in this order:
a. Elimination/Substitution
b. Engineering or Administrative Controls
c. Personal Protective Equipment (PPE) - What are you going to do if something goes wrong? What are your emergency procedures?
When determining the possible dangers, it is important to have a written procedure with all materials listed. Without that, a hazard assessment is very difficult. A review of the safety data sheets (SDS) provided by the manufacturer of the chemicals used is a good first step. Then look at each of the procedures involved, with a particular focus on what could happen. What chemicals are you using? In this case, a flammable liquid, methanol, is used. What about the location of your proposed experiment? For example, is the room crowded? Can students easily move to watch the experiment at a safe distance? Are there fumes that result from the experiment that are harmful?
Mitigating possible dangers is the next step. Can a safer experiment be substituted or performed as a demonstration? The ACS Committee on Chemical Safety has prepared a new version of the traditional rainbow flame demonstration that does just that — downloadable as a free PDF titled, “New and Improved – Flame Tests Demonstration.” This version of the demonstration does not involve flammable liquids, thus completely removing one of the hazards.
Alternatively, presenting a video of an experiment could be even more preferable, especially if the activity is very dangerous. ACS has developed an excellent video of this same experiment. These are examples of elimination and substitution. Using a fume hood or shield is an example of an engineering control. Administrative controls include reviewing the experiment with the students, and going over any sections which may be particularly dangerous.
It is important that safety be included as a key part of the discussion about any experiment. The last way to mitigate a specific danger is the use of PPE. This is usually the first thing we think of — however, it should be the last resort. That sounds strange, I’m sure. We all know to put on our goggles and lab coats, but don’t often talk about the other ways to keep everyone safe. Even during demonstrations, students should be wearing the same protective equipment. So if as the presenter you are wearing goggles and a lab coat, your students should do so as well.
What if, no matter how much you’ve prepared, something still goes wrong? A written emergency plan is important. Equally important is reviewing the plan with all participants. If a fire does get out of control, and students are injured, it is imperative that swift action is taken. Is there a safety shower or fire blanket in your classroom lab? Have you practiced using them? Practicing an emergency plan with your students is a good learning tool and increases general safety awareness.
Once a hazard assessment is complete, the safety controls that are needed can be implemented. The NFPA is a trade association that provides scientifically-based standards and codes. Many local governments have adopted these standards. Even if your particular location has not adopted the NFPA standards, they are still good resources for fire safety in chemical laboratories. NFPA provides excellent information on the safety precautions that should be in place for demonstrations in general, in the latest edition of the "NFPA 45-2015 Standard on Fire Safety in Research Laboratories Using Chemicals."
In Chapter 12 of NFPA 45-2015 (titled Educational and Instructional Laboratory Operations) there are recommended standards that apply to all schools, and specify safe ways to perform science demonstrations that involve hazardous materials. For example, the chapter recommends:
- When an instructor is performing a demonstration using hazardous materials, they shall create a documented hazard risk assessment, and also provide a safety briefing to students, adequate PPE, and a safety barrier between students and the demonstration (when appropriate).
- The requirements for handling and storing chemicals in school labs include storing and handling bulk quantities of chemicals in a separate room outside of the classroom. Chemicals that will be used in the classroom will be prepared before the students arrive and pre-apportioned in sealed containers or eye-dropper bottles in the amount that is needed for each demonstration. Chemicals that are not in use need to be locked in appropriate storage cabinets.
- Demonstrations that involve open flames, fire, or the use of flammable, reactive, toxic, or corrosive chemicals must be performed with a barrier or adequate separation between the students and the demonstration.
- So that students will be able to get out of the lab quickly, demonstrations must be performed in a location that will not block access to the exit(s) from the laboratory.
Missed opportunities for greater safety
Accidents resulting from the “rainbow experiment” could have been averted if the above suggestions had been in place. Several accidents occurred because presenters had placed a larger container of methanol next to the demonstration. Additional methanol was added to the demonstration while it was still hot, resulting in a ball of fire that severely burned teachers and students.
There are alternatives to the traditional rainbow experiment. Some of them require a little more preparation, but still provide the colorful flames.
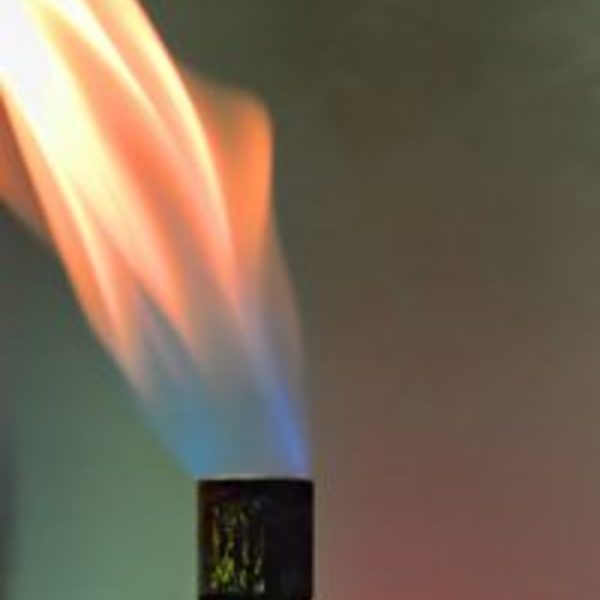
In the ACS flame test, various salt solutions are dissolved in DI water. Wooden applicators (not plastic) are then soaked in each salt solution, in separate containers, until all the liquid has evaporated (this can take up to a week). The wooden applicators are then placed into a Bunsen burner flame to show the specific color resulting from each salt. Barium chloride (light green flame), calcium chloride (orange red flame), and potassium chloride (light lilac flame) are some of the salts that can be tested in this way.
 As you can see, this version of the procedure completely eliminates the need to use methanol. However, a flame source is still required — so it is not without risk. It also takes a bit more preparation time to soak the wooden applicators in the salt solutions and let the liquids evaporate. Even so, this experiment is a promising alternative. To view the complete procedure, click here. In addition, NFPA has published a “Lab Fire Safety 101” poster that you may find useful as well.
Ensuring an amazing (and safe) learning experience
As science teachers, we want to inspire our students to investigate the wonders of our world. In fact, the curiosity we awaken is one reason many of us chose teaching as a career in the first place. Above all, we want our students to go back to their homes as happy and healthy as they were when we welcomed them into our classroom. Therefore, before we move forward with any experiment, we need to:
- Perform a hazard assessment to review all possible ways the experiment could go wrong.
- Mitigate those hazards as much as possible, knowing that wearing goggles and lab coats may not be enough.
- Plan for emergencies, and practice our plan.
Performing a hazard assessment, mitigating those hazards, and preparing for emergencies are ways we can ensure we are doing everything we can to keep our students, and ourselves, safe. Even one student or teacher injured during an experiment is one too many. The accidents that have happened as a result of the rainbow experiment show that our culture of safety is lacking. Let’s all raise the bar, and make sure everyone goes home safe.
Photo Credit: Olivier/Bigstock.com (Top)